It’s easy to get started with diamond painting, but it takes time and a bit of knowledge to get the best results. There are a few things you need to know, including how to prepare your work, how to seal your diamond paintings, and a few other techniques.
Preparation
Diamond painting can be a fun and creative hobby. The trick is to prepare your canvas before you begin. You can create a beautiful diamond painting and use it as a decoration for your home. There are many tips to follow to achieve the look you want.
First, you will need to remove the outer cover from your diamond painting canvas. This will make it easy to work with. Another tip is to use parchment paper. It allows you to section your canvas into small areas, which is especially convenient if you are using a single color.
Next, you will need to choose a flat surface. A cutting board can be used to keep your essentials in one place. Make sure your table is clean and clear of any debris. Baby wipes can also be useful for wiping off dirt and fur.
Once you have completed the preparation, you can begin to paint. Start by laying out your diamonds. Tweezers can be used to fix any mistakes.
Work Your Way Up technique
Diamond painting is a method used to fill in gaps and voids in a picture. This method is especially useful when the picture is large and there are a lot of empty spaces.
There are a few different ways to accomplish this task. Some use a rolling pin, while others use a jar or can. It’s also possible to make your own tac by using an old glue stick.
For best results, you should start from the top of the canvas. This will help hold the canvas in place and give you a good quality finished product. However, you should also start with a small area. You don’t want to end up with a tangled mess.
Another way to work your way up is by working in a series of 2-inch by 2-inch sections. This will help you focus on one area at a time and make the process much more manageable.
One of the more common diamond painting techniques is to apply diamonds in a checkerboard pattern. This is a good idea if you have a large section that is only one color.
Partial drill vs square drill
One of the first questions you might ask when you’re thinking about learning how to do diamond painting is whether to use a partial drill or a square drill. Depending on your personal preferences, one of these may be the best way to go.
A partial drill is a type of diamond painting that only focuses on a particular object. It is often more popular with beginners, although it can also be done by experienced diamond painters. Partial drills are a little less time-consuming and can be used to emphasize certain parts of an image.
Square drills give a cleaner, polished look. They can be more challenging to work with, though. You will need to make sure you’re precise when placing them. Using tweezers or a brayer to hold them in place can help.
Some people are concerned that using a full drill kit will leave empty spaces in between diamonds. This can be an issue, particularly if you’re using craft putty rather than wax. But a roller can help keep them in place.
Sealer
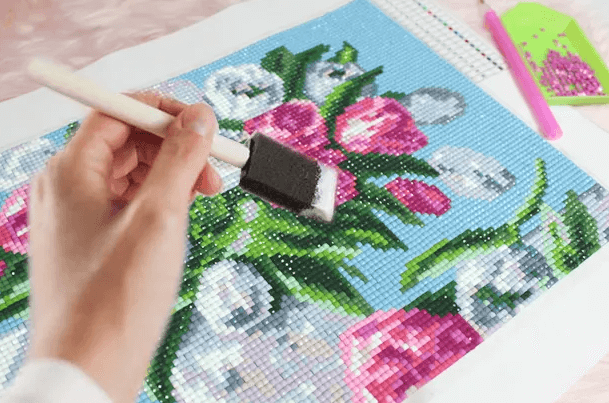
If you want to preserve your diamond painting, you’ll need to seal it before hanging. You can do this using a spray or brush sealer. Sealing it allows you to prevent dust from clinging to the adhesive on the diamonds. It will also add a layer of protection that will keep the painting in place even without a frame.
Spray and brush sealants can be used on a wide variety of craft projects. They come in a wide range of finishes. Brush-on sealers are more durable than spray sealers. However, they can cause wrinkling.
To apply the sealer, make sure you use a soft-bristled brush. A small, soft-bristled brush will give you more control over the application. Be sure to work in small, even areas so as not to create lumps.
Once the sealer is applied, allow it to dry overnight. Then remove the sealer using a craft scraper. Tweezers can also be used to get rid of excess wax.

